

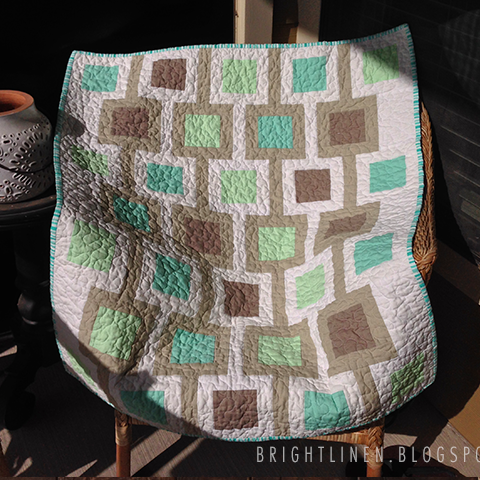
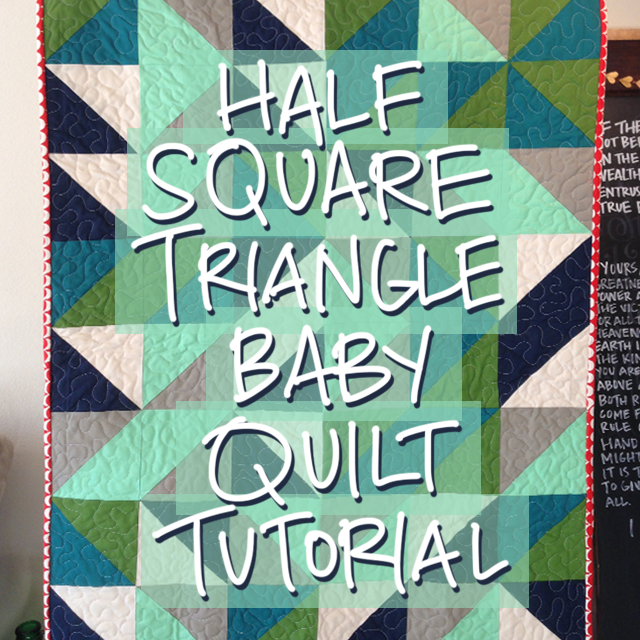
I love the way this baby quilt turned out. So simple and sweet. I decided to create a tutorial for how I went about putting it together. This definitely isn't the only way. Let me know if you have any questions!

Square Blocks
32 - 4" Squares
For my quilt, I used the below colors and amounts of each.
11 - Blue (Bella Solids Aqua)
9 - Dark Gray (Bella Solids Stone)
12 - Green (Kona Cotton Mint)
You can get 4" Squares from the following:
One 12"xWOF (WOF=Width of Fabric or 44") piece of fabric
32 Charm Pack Squares (Most charm packs come with 42 pieces of fabric.)
2 Fat Quarters (You can cut 20 4" squares from one fat quarter.)
32 scraps that are at least 4"x4"
Borders and Sashing Fabric
3/4 yard - Light Gray Fabric (I can't remember what I used, just be sure it's lighter than your dark gray squares)
1 yard - White Fabric (Bella Solids White)
Backing Fabric
Stripe Gray from the Lost and Found 2 collection by Mind's Eye for Riley Blake
Binding Fabric
Ticklish Tipsy Turquoise Laughing Stripes
Cutting Your Fabric

(I didn't use the orange pictured above and additionally used a light gray and white fabric.)
1. Cut out all of your 32 4" squares and set aside.

2. From your light gray fabric:
Cut 10 2" x WOF strips.
We are going to use these strips to chain piece. If you'd prefer not to chain piece, you can cut the following (I highly recommend chain piecing! It saves time and thread):
24 - 2"x8" strips
24 - 2"x4" strips
Subcut 16 - 2"x7" strips from 3 of them.

3. From your white fabric:
Cut 13 2" x WOF strips.
We are going to use these strips to chain piece. If you'd prefer not to chain piece, you can cut the following (I highly recommend chain piecing! It saves time and thread):
40 - 2"x8" strips
40 - 2"x4" strips
Subcut 9 - 2"x7" strips from 2 of your 2" x WOF strips.
Also, cut one 5" x WOF strip. Take your 5" strip and sub cut into six 5"x7" rectangles.

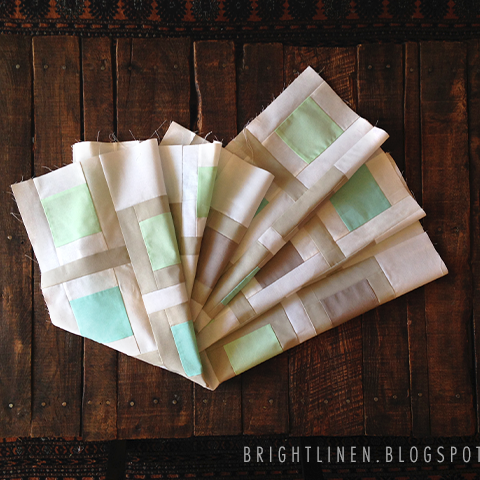
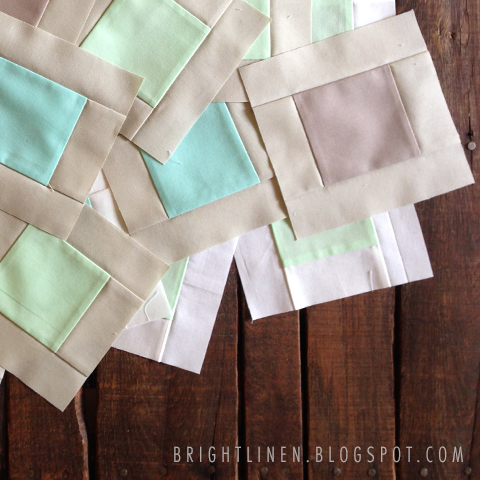
Creating the Blocks

Now that our fabric is cut, we are going to separate our squares into two groups. One group will be bordered in white fabric while the other with be bordered in gray fabric.
4. Group One (will be bordered in gray fabric):
Gather 12 squares. For mine I took 3 blue squares, 5 gray squares, and 4 green squares.
5. Group Two (will be bordered in white fabric):
Gather 20 squares. For mine I took 8 blue squares, 4 gray squares, and 8 green squares.

6. Take Group One and use your gray 2"xWOF strips to chain piece down one side of your 4" squares. When chain piecing, try to leave no more than a half inch gap between squares. (If you decided not to chain piece, use 12 of your 2"x4" strips.)

7. Once you've sewn the gray strip of fabric down one side of your 12 squares in group one, cut the remaining gray strip of fabric off at the end. You can cut apart each square or just turn the whole thing around and chain piece again the same way down the opposite side. (If you are not chain piecing, use the remaining 12 gray 2"x4" strips here.)

8. Once you've finished chain piecing the gray strips of fabric down two opposing sides of your squares, cut them apart, set your seams, and press them open. Once pressed open, use your square piece of fabric as a guide for squaring up the strip you sewed on.

9. Take another 2" gray strip of fabric and repeat steps 6-8 on the other two sides of your squares. (Use your 2"x8" strips for this if you are not chain piecing.) Once the squares are bordered, square them up to 6.5".

10. Take Group Two and repeat steps 1-4 with your white strips of fabric. (If you are not chain piecing, use your 40 2"x4" strips for the first two sides and your 40 2"x8" strips for the last two sides.)

11. Once all of your squares are bordered in your gray and white fabric, you should be left with 32 6.5"x6.5" blocks!

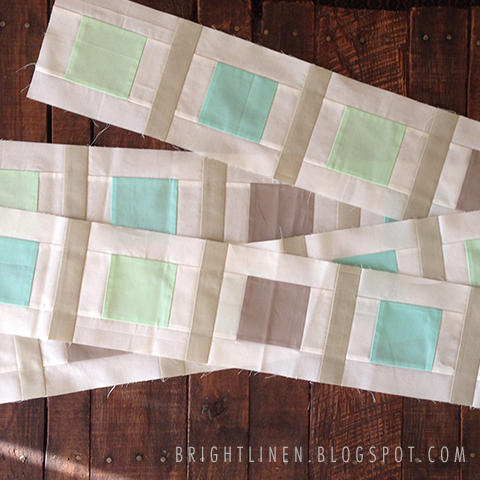
Creating the Rows
Now that we have all of our blocks created, it's time to sew them into rows! We will have 4 rows of 5 blocks bordered in white and 3 rows of 4 blocks bordered in gray.

12. Sew 4 White Block Rows:
Each white block row includes 5 white blocks and 4 2"x8" gray strips.
Sew each row in this order:
White block, gray strip, white block, gray strip, white block, gray strip, white block gray strip, white block.
Once the row is sewn together, trim the sashing strips to the same height as the blocks.

13. Sew 3 Gray Block Rows:
Each gray block row includes 4 gray blocks, 3 2"x8" white strips, and 2 5"x7" white rectangles.
Sew each row in this order:
White 5" x 7" rectangle, gray block, white strip, gray block, white strip, gray block, white strip, gray block, white 5" x 7" rectangle.
Once the row is sewn together, trim the sashing strips and rectangles to the same height as the blocks.

Piecing the Top
Now that we have all our rows sewn, all we have to do is sew them together!

14. Sew rows together on top of one another alternating white rows and gray rows.
Completing Your Quilt
You've now complete piecing the top! Way to go! Now you just have to baste, quilt, and bind. I quilted this in a free-motion meandering quilt pattern.

When I started this quilt, I wasn't exactly sure how wide it would end up being. Luckily, it's narrow enough that you can use one piece of fabric for the back. I love not having to piece backing fabric together. I know a lot of quilters take a time and care in thinking about the back of the quilt, but once I finish completing the top of mine, I'm ready to move on to the next one! So, anything that will push me to complete the whole thing is a bonus.
I've found using a neutral backing fabric really makes the front pop. For the backing I used a gray and white striped fabric called Stripe Gray from the Lost and Found 2 collection by Mind's Eye for Riley Blake. For the binding, I used a cute blue and white striped fabric called Ticklish Tipsy Turquoise Laughing Stripe.
Finished!

We're now completely finished with our square baby quilt! Thanks for following along this tutorial. Please let me know if you have any questions or if there are any mistakes I've made while putting this together. I'm certain someone will find something :)
Related Posts:
|
|
|
|
 |
| HST Quilt Tutorial |
Lovely baby quilt! The soft solids are just charming. Am excited to make it and am wondering what the finished dimensions are. Thanks for the tutorial!
ReplyDelete@Donna, so glad you like it! :) The final size ended up being about 36.5" x 42.5"; a little smaller than an average baby quilt. Good luck making yours!
Delete