Showing posts with label Modern Quilting. Show all posts

2.24.2014

Chicopee Potholder


I thought I'd share a little potholder I made for my mom a while back. I just used a current potholder I had as a template. I made it at least an inch bigger all the way around. I quilted two sandwiches bigger than I would need and then I cut them down to size. I didn't have heat resistant batting on hand so I just used two layers of batting. It seems to have worked for her!


I mostly used scraps I had left over from piecing this quilt that I am hand quilting. I haven't worked on that quilt in such a long time! The fabric is from the Chicopee line from Denise Schmidt. I love the saturated colors! 


It was a quick project that has been useful to mom ever since. I love projects that get a lot of use once finished!


Related Posts:


JellyRollQuilt
Jelly Roll Quilt

2.21.2014

Tutorial: Square Baby Quilt


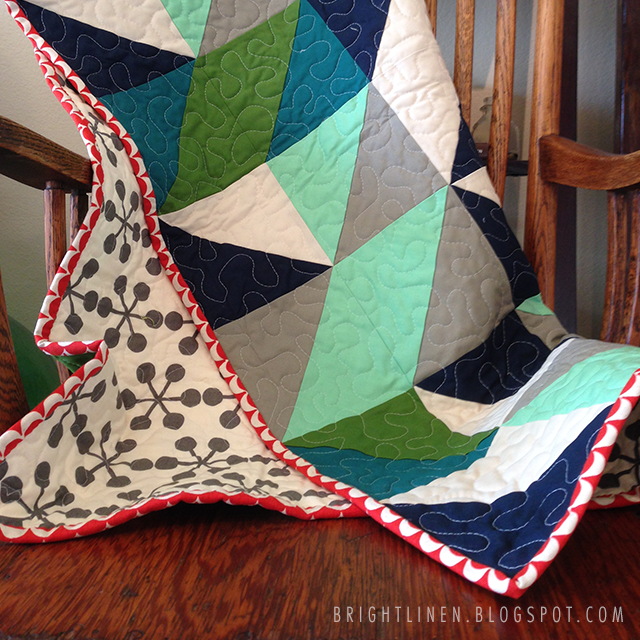
I love the way this baby quilt turned out. So simple and sweet. I decided to create a tutorial for how I went about putting it together. This definitely isn't the only way. Let me know if you have any questions!


Materials

Square Blocks
     32 - 4" Squares
          For my quilt, I used the below colors and amounts of each.
          11 - Blue (Bella Solids Aqua)
            9 - Dark Gray (Bella Solids Stone)
          12 - Green (Kona Cotton Mint)

          You can get 4" Squares from the following:
                    One 12"xWOF (WOF=Width of Fabric or 44") piece of fabric
                    32 Charm Pack Squares (Most charm packs come with 42 pieces of fabric.)
                    2 Fat Quarters (You can cut 20 4" squares from one fat quarter.)
                    32 scraps that are at least 4"x4"

Borders and Sashing Fabric
     3/4 yard - Light Gray Fabric (I can't remember what I used, just be sure it's lighter than your dark                gray squares)
     1 yard - White Fabric (Bella Solids White)

Backing Fabric
     Stripe Gray from the Lost and Found 2 collection by Mind's Eye for Riley Blake

Binding Fabric
     Ticklish Tipsy Turquoise Laughing Stripes

Cutting Your Fabric


(I didn't use the orange pictured above and additionally used a light gray and white fabric.)

1. Cut out all of your 32 4" squares and set aside.


2. From your light gray fabric:

Cut 10 2" x WOF strips.
We are going to use these strips to chain piece. If you'd prefer not to chain piece, you can cut the following (I highly recommend chain piecing! It saves time and thread):
24 - 2"x8" strips
24 - 2"x4" strips

Subcut 16 - 2"x7" strips from 3 of them.


3. From your white fabric:

Cut 13 2" x WOF strips.
We are going to use these strips to chain piece. If you'd prefer not to chain piece, you can cut the following (I highly recommend chain piecing! It saves time and thread):
40 - 2"x8" strips
40 - 2"x4" strips

Subcut 9 - 2"x7" strips from 2 of your 2" x WOF strips.

Also, cut one 5" x WOF strip. Take your 5" strip and sub cut into six 5"x7" rectangles.


Creating the Blocks


Now that our fabric is cut, we are going to separate our squares into two groups. One group will be bordered in white fabric while the other with be bordered in gray fabric.

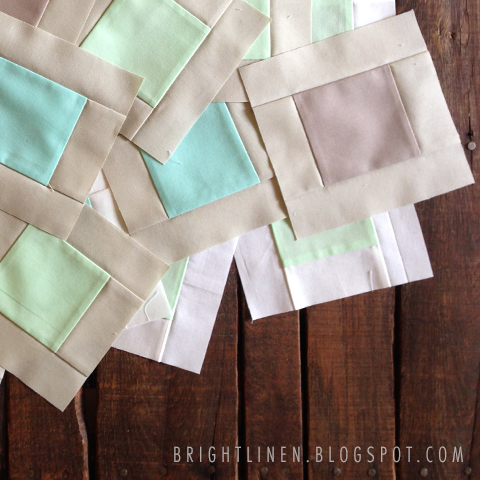
4. Group One (will be bordered in gray fabric):

Gather 12 squares. For mine I took 3 blue squares, 5 gray squares, and 4 green squares.

5. Group Two (will be bordered in white fabric):

Gather 20 squares. For mine I took 8 blue squares, 4 gray squares, and 8 green squares.


6. Take Group One and use your gray 2"xWOF strips to chain piece down one side of your 4" squares. When chain piecing, try to leave no more than a half inch gap between squares. (If you decided not to chain piece, use 12 of your 2"x4" strips.) 


7. Once you've sewn the gray strip of fabric down one side of your 12 squares in group one, cut the remaining gray strip of fabric off at the end. You can cut apart each square or just turn the whole thing around and chain piece again the same way down the opposite side. (If you are not chain piecing, use the remaining 12 gray 2"x4" strips here.)


8. Once you've finished chain piecing the gray strips of fabric down two opposing sides of your squares, cut them apart, set your seams, and press them open. Once pressed open, use your square piece of fabric as a guide for squaring up the strip you sewed on.


9. Take another 2" gray strip of fabric and repeat steps 6-8 on the other two sides of your squares. (Use your 2"x8" strips for this if you are not chain piecing.) Once the squares are bordered, square them up to 6.5".


10. Take Group Two and repeat steps 1-4 with your white strips of fabric. (If you are not chain piecing, use your 40 2"x4" strips for the first two sides and your 40 2"x8" strips for the last two sides.)


11. Once all of your squares are bordered in your gray and white fabric, you should be left with 32 6.5"x6.5" blocks!


Creating the Rows

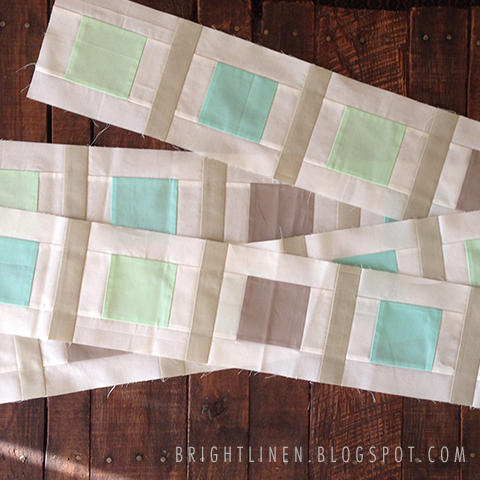
Now that we have all of our blocks created, it's time to sew them into rows! We will have 4 rows of 5 blocks bordered in white and 3 rows of 4 blocks bordered in gray.


12. Sew 4 White Block Rows:

Each white block row includes 5 white blocks and 4 2"x8" gray strips.
Sew each row in this order: 
White block, gray strip, white block, gray strip, white block, gray strip, white block gray strip, white block. 

Once the row is sewn together, trim the sashing strips to the same height as the blocks.


13. Sew 3 Gray Block Rows:

Each gray block row includes 4 gray blocks, 3 2"x8" white strips, and 2 5"x7" white rectangles.
Sew each row in this order: 
White 5" x 7" rectangle, gray block, white strip, gray block, white strip, gray block, white strip, gray block, white 5" x 7" rectangle.

Once the row is sewn together, trim the sashing strips and rectangles to the same height as the blocks.


Piecing the Top

Now that we have all our rows sewn, all we have to do is sew them together!


14. Sew rows together on top of one another alternating white rows and gray rows.

Completing Your Quilt

You've now complete piecing the top! Way to go! Now you just have to baste, quilt, and bind. I quilted this in a free-motion meandering quilt pattern.


When I started this quilt, I wasn't exactly sure how wide it would end up being. Luckily, it's narrow enough that you can use one piece of fabric for the back. I love not having to piece backing fabric together. I know a lot of quilters take a time and care in thinking about the back of the quilt, but once I finish completing the top of mine, I'm ready to move on to the next one! So, anything that will push me to complete the whole thing is a bonus.

I've found using a neutral backing fabric really makes the front pop. For the backing I used a gray and white striped fabric called Stripe Gray from the Lost and Found 2 collection by Mind's Eye for Riley Blake. For the binding, I used a cute blue and white striped fabric called Ticklish Tipsy Turquoise Laughing Stripe.

Finished!


We're now completely finished with our square baby quilt! Thanks for following along this tutorial. Please let me know if you have any questions or if there are any mistakes I've made while putting this together. I'm certain someone will find something :)

Related Posts:

SquareQuiltComplete
Square Quilt Complete
SquareBabyQuiltTopPieced
Square Quilt Pieced
SquareBabyQuiltWIP
Square Quilt WIP 
SquareBabyQuiltBlocks
Square Quilt Blocks

HalfSquareTriangleQuiltTutorial
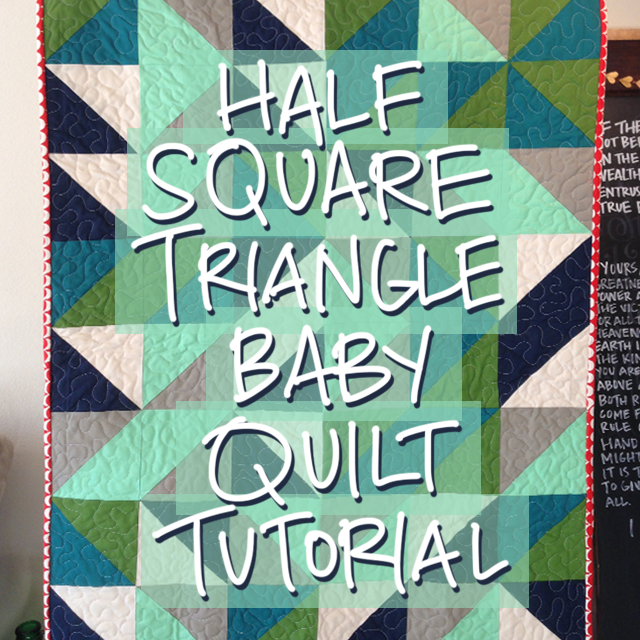
HST Quilt Tutorial


2.06.2014

Plus Baby Boy Quilt


I made this plus quilt a while back, in May 2013, for Daniel's boss. She had a sweet baby boy and we couldn't wait to give this to him! 

I used my scraps for this project. A lot of the fabric is left over from this quilt. I'd like to try this again with smaller crosses at some point too. All in all, a fun quilt!

Related Posts:


HalfSquareTriangleQuilt
HST Quilt

1.31.2014

Video: Free Motion Quilting - Flower

I've ventured from my beloved meandering free motion quilt pattern! My mom gave me Angela Walters' Free-Motion Quilting book a while back and I have been wanting to try her techniques on a quilt. I made a little video showing how I used her flower quilting pattern. Here's to trying something new! (Don't mind The Office playing in the background.)


Flower Free Motion Machine Quilting from Ashton Lloyd on Vimeo.


You'll notice that I didn't worry about the tail end of the thread all over the place. Once I finished I just snipped it and pulled it out. I figured my petals wouldn't be as smooth if I stopped to cut it out. It's faster this way too. I also have a machine that will automatically sew when I push a certain button; pair that with moving the fabric around at a consistent speed and the result is really even stitch lengths!

View the video in your browser here.

1.29.2014

Square Baby Quilt Complete


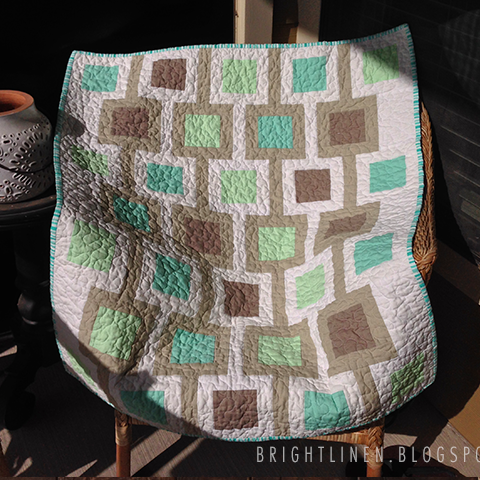
I finished the square quilt I have been working on recently! I love the way it turned out. I hope my sweet friend does too. I hope she wraps her little baby boy up it in when he gets here! As I mentioned before, this quilt is based on "Modern Meadow" by Lee of Freshly Pieced. She said hers is based on "Chain Linked" by Amy Smart of Diary of a Quilter. 

Edit: You can find my tutorial of this quilt here.


Washing and drying quilts always make them so crinkly. So fun!


The light was really harsh when I was snapping these pictures, but I had about 20 minutes to take them and wrap it up before we went to the shower.

For the backing I used a gray and white striped fabric called Stripe Gray from the Lost and Found 2 collection by Mind's Eye for Riley Blake. I've found that I love neutrals for the back of my quilts lately. It makes the piecing on the front stand out so much more. 


I picked up this t-shirt box at Michael's. There is one about 2 minutes from our apartment. Dangerously close. I just used some black paint I had on hand to write little Lukes name on top. I've found that using apparel puff paint makes it so easy to write text when you're in a time crunch. All in all this was such a fun quilt to work on.

I also featured this packaging on my Calligraphy blog if you wanted to check it out!

Related Posts:


SquareBabyQuiltTopPieced
Square Quilt Pieced
SquareBabyQuiltWIP
Square Quilt WIP 
SquareBabyQuiltBlocks
Square Quilt Blocks

1.27.2014

Baby Girl Pinwheel Quilt


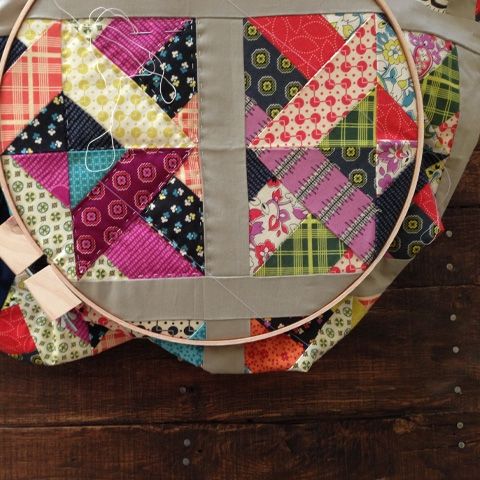
Today I thought I would share a baby girl quilt my sweet mom finished recently. I gave her a Hello Gorgeous charm pack by Melissa Ybarra for Windham Fabrics for Mother's Day last May and was so excited to see what she had done with it. I purchased the fabric from Missouri Star Quilt Company. They have so many precut options. She used that charm pack along with white fabric (not sure what kind) and linen for the sashing. Isn't it beautiful?! If I remember correctly, I think she used the bottom left hand corner pinwheel print called Petal Penache for the backing.


The pinwheels are just half square triangles and really pop against the neutral linen. She quilted it using the meandering free motion quilting pattern. Here favorite too! Elizabeth Hartman has a great tutorial here. 

A couple of weeks ago she gave this to a family that adopted a sweet little girl. I'm sure she will love it!

1.16.2014

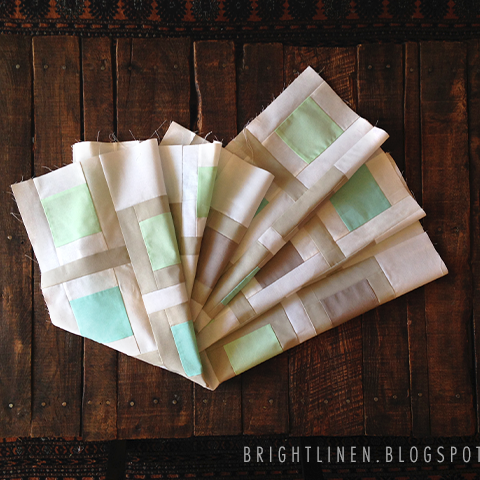
Square Baby Quilt Blocks


I've started working on a new baby boy quilt for a sweet friend of mine. I'm usually finished with quilts weeks before baby showers so I have time to focus on food and decorations but I am so behind on this one! Her shower is in 2 weeks! I am going to have to speed through the process. I'm kind of at a stand still because I ran out of white fabric. I have other white fabric but it doesn't exactly match. I need to just buy one kind of white fabric so I don't run into this problem in the future. I might go ahead and cut the binding and batting as I'm waiting for it to come in. 


This quilt is based on "Modern Meadow" by Lee of Freshly Pieced. She said hers is based on "Chain Linked" by Amy Smart of Diary of a Quilter. 


So far I've been able to use my scraps from my recent Pinwheel Quilt which has been nice. I'm reeeallly trying to not let my fabric stash get out of control. It's always fun buying new fabric for a new project but it's also a great feeling being able to complete a project using what you already have!


The fabrics used in these blocks are Kona Cotton Mint, Bella Solids Stone, Bella Solids Aqua, Bella Solids White Bleached, and another gray that I can't remember the name of! I bought it at City Craft when they were having a moving location sale. 60% off everything in the store! Can't beat that!


For these blocks I used 4 inch square blocks with 2 inch strip sashing. Once the blocks were completed I squared them up to 6.5 inches. This is when my little 6.5 inch acrylic ruler comes in handy. I'm ready to complete this quilt top! Here's hoping my fabric will get here today (fingers crossed)!

Related Posts:

1.15.2014

Wonky Star Baby Quilt Top


I finished piecing together this wonky star quilt top. I love the way it turned out. It was so fun to put together since there wasn't an exact pattern to follow. 


I started piecing this after I saw Jolene's post on her blog Blue Elephant Stitches. She linked to the Wonky Star Tutorial found here.


I used scraps I had on hand. A few Kona Solids, a Kaffe Fassett print, some quilters linen, and a few other prints. I need to get more of the Dottie Cream Shroom print. I've found it's interesting yet subtle and goes with most everything I piece together.


This will be another baby quilt. Not sure who it will end up with yet!


Now to figure out what to use for the backing and binding...