Showing posts with label Scraps. Show all posts

3.14.2014

Scrappy Pillow WIP


I'm in the process of putting together a new little pillow for our couch. I've been wanting to do this for some time now but have always been working on other projects! I've pulled some scraps from my stash. I'm liking it so far! I'm trying to decide if I want to add sashing, or a border around the 4 patches, or cut the 4" squares down to the 4-patch size... I'm not sure how it will turn out yet but it's fun working on a small project that will be displayed in our home!


Related Posts:


Scrap Organization
Scrap Organization

2.19.2014

Scrap Organization


Today I thought I'd share how I organize my scraps. 


I've just recently started this process and I love it! Basically, rather than keeping wrinkly odd shaped pieces of scrap fabric stuffed into tubs or jars, I take a little extra time after each project I complete to iron and cut them down to manageable sizes. I can't remember where I saw this idea. I think in one of my mom's quilting magazines a while back? 


You can cut your scraps down to whatever size you use most frequently. As you can see in the picture above, I decided to cut my scraps into 2", 3", 4", and 5" squares. I also decided to cut my longer scraps down to 2.5" strips. This is the size I use for binding my quilts and is also the width of jelly rolls.


I am much more anxious to start a scrappy project when I look at my scraps now! They are just begging to be put to use. Though, I think I'm going to wait a little longer so I have more to work from. I'm not sure I have enough yet to complete a whole quilt. I'd love to make one like Jodi did from Pleasant Home. She calls it her Scrap Jar Quilt. I think I would just need to use my 2" squares and 4" squares to create those half square triangles. I'd also need a ton of white! So pretty.


All in all, I would highly recommend storing your scraps this way! I am determined not to have bins and bins of fabric and this will definitely help me follow through!


I'd also like to point out these beautiful flowers. My husband gave them to me for Valentine's Day a few days ago. He's the sweetest!

9.18.2013

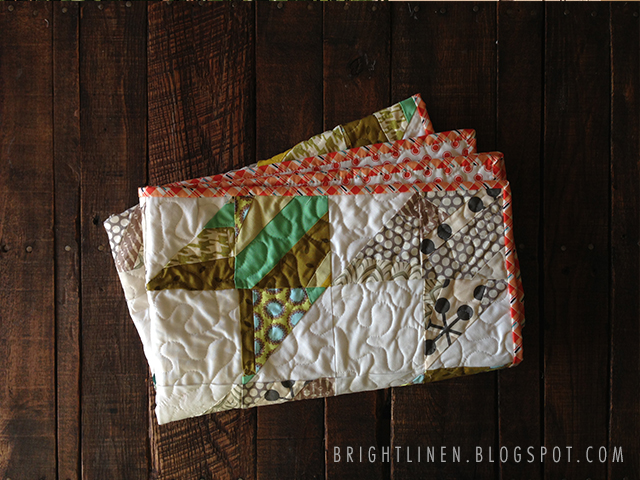
Scrappy Chevron and On Baby Quilt Finished


I completed my Chevron and On Quilt!


Like I had mentioned a few posts before, I decided to do a meandering free-motion quilt pattern. I love the crinkle texture that it gives. Once I wash it, it will be even crinklier. Can't wait!


For the backing and binding, I purchased some of Denise Schmidt's line for Jo-Ann. The backing is called Dot Dot Dot Red and the binding is called Blossom Reel Plaid Orange. They were both on sale too!


I hand stitched the back of the binding. It's really relaxing to do while sitting on the couch watching tv. It's nice to get away from the machine sometimes. Although, there have been a few instances when I was in a time crunch and used the machine to finish the binding. It doesn't look horrible but it doesn't look as clean as hand binding does.


Now that I finished the quilt for the precious baby boy, I can get started on the decorations for the shower next month! So glad to have this done ahead of time. No stress involved.


I can just imagine this wrapped around a sweet baby boy. Can't you?!


9.10.2013

Chevron and On Baby Quilt Progress


Daniel and I have sweet friends in our home group that found they are pregnant with a baby boy! We couldn't be happier for them. 


I decided to use up some scraps that were taking up space! Megan of Canoe Ridge Creations blogged about her adorable pattern Chevron and On. I'm not sure her exact measurements but I cut out 20 5" squares and 10 7.5" in squares of paper to use as my backing for my scrap piecing. 


I created my half square triangle blocks out of my 7.5" squares using this method Jenny from Missouri Star Quilt Co. explains in this video. Now time to square them up and piece them together!